One of the greatest inventions in the world of clothes has to be yoga pants. A pair of yoga pants offer the greatest level of comfort – and that’s not limited to just yoga sessions. Most of us are guilty of wearing these stretchy pants all the time! But have you ever wondered: how to hem yoga pants?
The only reason we ever think of hemming pants is when we want to adjust the length. When it comes to yoga pants, this exercise can be a little tricky because of the stretchy material used for making yoga pants. However, with the right stitch or a machine, you can hem yoga pants quite easily.
Let’s take a look at how you can hem yoga pants using a machine or by hand.
How to Hem Yoga Pants
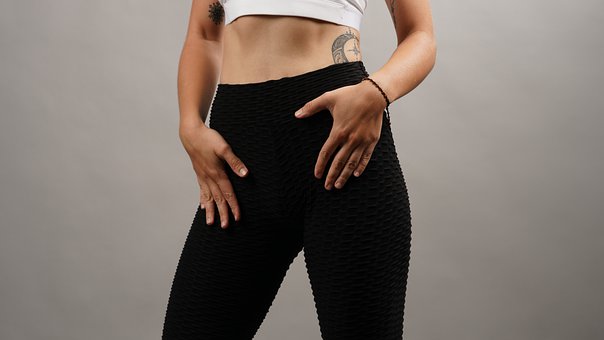
Everybody loves yoga pants. Some people are pretty addicted to them and wear them to the supermarket or a drive to their kids’ school to pick them up. Honestly, we wear them almost everywhere and often skip the yoga part, right? But what do you do when you need to adjust the length of yoga pants?
Hemming yoga pants can be challenging due to the stretchy material. There’s a chance that the stitches will come off if you choose the wrong hand stitches or use the straight stitch. So you have to use stretch stitches. A machine with built-in stitches will work best. Narrow zigzag stitches also do a neat job.
The first thing you need to do is remove the existing hemstitches carefully, without tearing or damaging the fabric. To know how much you want to hem the pants, you’ll need the measurement from your waist up to the point where you want your pants to end. To mark the length of the pants, use a straight pin.
Make sure to leave around 3-4 inches below this mark, and start cutting along this. This extra fabric is the part that you will have to fold up at the mark made earlier. Then begin stitching to get a thick band of material at the bottom. You can even add an elastic band so that the leg sleeves grip your legs.
The easiest way to hem yoga pants is by using a sewing machine. If you know how to use one, the process will become much quicker for you. You have to make sure that you fold the ends correctly. Newbies may need more time to do this. Hand sewing is also an option, though it will take more time.
How to Hem Yoga Pants Using A Sewing Machine
Let’s check out the steps you need to follow to hem your yoga pants using a sewing machine.
- Removing the Existing Hem Stitches
Yoga pants likely have hemstitches already at the time of the purchase. The first thing you will need to do is remove the hemstitches. For this, use a seam ripper. This can be a handy tool, especially if the length is only about a couple of inches. This step needs your patience lest the fabric gets ripped.
- Measuring the Length of the New Hemline
Using a measuring tape or scale, measure the new length of the pants. Then, measure the length that you want, and mark that on the leg sleeves using straight pins. If the process seems confusing, you can put on the pants to take the two measurements. Then mark the desired length on the pants.
- Ironing the Pants
Fold all the extra fabric below the desired length into the cuff and press them down. Set your iron to the material’s best temperature and press the hot iron on the folded section. Be careful about the alignment and make sure they are not uneven before you use an iron to press on the folded areas.
- Pinning the Edges of the Pants and Cutting the Extra Fabric
Place the pants flat on an even surface and unfold the bottom of the leg sleeves. It’s time to cut the extra fabric off. First, pin the edges to the surface to keep the material in place. Leaving 3-4 inches below the new hemline, make a mark using chalk and a straight ruler. Start cutting along this chalk mark.
- Folding the Edges and Stitching
Fold the extra fabric at the new hemline and use pins to secure the fold. Then, start sewing about a quarter of an inch below the frayed edges. You have to use a stretch stitch like the zigzag stitch for this. This type of stitch will allow stretching and will not come undone. It will also give the needed support.
Once you reach the stitch’s start again, overlap the stitches a little further for better security. You can cut some extra thread and tie a knot before removing it. The process will need a double needle. If your machine doesn’t support a double needle, it should have a built-in mode for zigzag stitches.
How to Hem Yoga Pants Using the Hand-Stitching Method
If you don’t own a sewing machine or don’t feel comfortable using one, you can hem the pants by hand-sewing. Let’s take a look at a simple method of doing so.
- Remove the existing hemstitches and put the yoga pants on.
- Fold the fabric up until you reach the length of the hemline you want. Use pins to secure the folds.
- Remove the pants carefully so that the pins don’t prick you and stay in place.
- Using chalk or a fabric marker, mark the parts where the pins are. This is your desired length.
- Remove the pins and unfold the fabric. Stretch it out on a flat surface.
- Leaving a couple of inches below the mark, cut off the excess fabric.
- Turn the fabric up, folding at the line you have marked.
- Pin the section again to ensure that the folds remain in place.
- Using a stretch stitch of your choice, sew along with this cut and folded edge of the fabric, leaving a gap of around a quarter of an inch from the edge.
- Tie the string into a knot and remove the extra thread.
It is not at all challenging to do stretch stitches even when you are hand stitching. You can learn to perform this stitch efficiently with all the online guides readily available for beginners and intermediates in sewing. The stretch stitch will give elasticity to the leg sleeves and allow them to be stretched.
More Tips
Now you have a basic idea about hemming yoga pants to get the perfect length for you. It can be an easy task if you know how to sew, whether by hand or using a suitable sewing machine. But if you have ever tried sewing, you probably know that it’s more than just a theoretical understanding of stitches.
Here are a few tips that you can follow to ensure that you get the most out of the process. Let’s take a look:
- It is good to use ballpoint needles instead of regular needles for hemming yoga pants to prevent the stretchy fabric from getting damaged.
- If you find it difficult to take measurements or use pins properly, don’t forget to take help from someone to get a neat look.
- While taking measurements, if you feel that placing it on the ground is too tricky while measuring, it’s a good idea to slip the yoga pants on.
- The hem uses a thread of the same color as the fabric and the other threads used for sewing. If you are unable to find the right color, use black as it goes with all shades.
- Use a seam ripper to remove existing hem stitches to prevent ripping the fabric of the yoga pants you’re trying to hem.
- Always maintain 3-4 inches of spare fabric at the bottom below the desired length you wish to achieve. This part will be folded and stitched.
- Do not make the folds at the bottom too short as the gathered fabric will cause bunching, and it will be difficult for you to sew it.
- If you cannot decide the best length for yoga pants that are too long for your legs, you can use a template.
- If you’re using a template, fold it in half and place it in a single leg to complete the measurements and hemming before moving to the next leg.
- Remember that yoga pants are made of sensitive stretchy materials. So set your iron to a moderate temperature for ironing the pants.
- Use a stitching surface and pins as much as you can to flatten the yoga pants and get the best alignments. Use straight rulers as often as you can.
- Make all markings with chalk and fabric markers on the inner side. To make things easier, turn the pants inside out at the time of measurements.
- Instead of scissors, you can use a rotary cutter for a smoother finish. This will allow you to cut multiple layers of fabric together.
- While sewing, keep stretching the fabric as much as possible to ensure that the leg sleeves’ mouths are flexible and fit your legs snugly.
Follow these essential tips to ensure that everything is in order before you start sewing to hem your yoga pants and get the length that makes you feel comfortable.
Hemming Yoga Pants with a Sewing Machine
The fastest and easiest method of sewing the hemline of yoga pants is by using a sewing machine. Unless you’re using a cover stitch sewing machine, you will need to use a device that supports double-needle stitching or has the in-built option to perform zigzag or other stretch stitches.
For most machines, you will need to invest some time, in the beginning, to select the proper settings and set the needles before you can hem your yoga pants.
The two best options for sewing the hemlines of tour yoga pants shorter are double-needle hemming and zigzag hemming. Let’s understand each in detail.
a) Double-Needle Hemming
A double-needle, also known as the twin-needle, can sew stretch stitches in two rows closely set. These two straight stitch rows are visible at the top.
On the reverse side, the bobbin thread helps sew a zigzag stitch. While this is an excellent method that’s also quick, it has its drawbacks –
- Ridges or tunnels can quickly form between the stitch rows, especially if the fabric used is thin.
- If your stitch length is too long, there’s a possibility of the seam popping when stretched out.
To minimize tunneling, you can reduce the bobbin tension. But first, make a note of the tension setting before the chance.
You can also try using a different bobbin for your experiments. You can also try water-soluble stabilizers to keep the fabric flat, though the ridge might return after washing the fabric.
b) Zigzag Hemming
To sew stretchy seams, one of the best stitches is the zigzag. It not only adds stretchiness to the seams but also is easy to sew. Plus, your machine will likely offer you several settings with which you can experiment. You can use a medium zigzag and keep the stitch length longer than the default setting.
Instead of sewing directly on your yoga pants, it’s a good idea to take a spare piece of stretchy fabric and experiment on it. Check if the seam pops when you stretch it out. If it does, it means you need to use a shorter stitch length or broader stitches. Keep experimenting with stitches until you hit the sweet spot.
Sewing Yoga Pants from Scratch
Hemming yoga pants is one thing. But can you sew one from scratch at home? If you know your way around sewing tools, you can do it.
It will give you the chance to make customized yoga pants that will reflect your choice. You might be able to make a style statement with your DIY pants!
Let’s find out how you can do that!
1. Finding a Pattern
The first thing to do is choose a pattern that seems appropriate for your yoga pants. There are plenty of sewing patterns available out there, and you can find one that suits you.
You can give your leggings a streetwear vibe or give your hems curved cuffs. You can choose any pattern that screams “you”.
2. Buying Stretchy Fabric
Yoga pants are always made of stretchy materials with Spandex. So look for a stretch knit fabric that has a strong recovery. This will allow the fabric to bounce back after it is stretched out or pulled. It’s only when the material can stretch and bounce back that the final pants will fit your body like a second skin.
3. Gathering Other Materials
To complete the entire process of making yoga pants from scratch, you will need a couple of other sewing tools. These include the following –
- Sewing needles: Depending on the kind of fabric you’re using, you’ll need stretch or ballpoint needles to fit into your sewing machine. The size should be 70, 80, or 90.
- Thread: If you’re using a conventional machine, you’ll need a spool of cone thread. For a serger, you’ll need around three spools. The thread color should match the fabric.
- Elastic: Most yoga pants have an elastic waistband. If you want to use the same, check your patterns to determine your pattern’s width of flexibility needed.
- Cutting mat: A cutting mat comes in handy when you’re trying to measure the fabric, hold it in place with pins, make marks in the fabric or cut it. It protects the material.
- Rotary cutter/scissors: Rotary cutters are the best for cutting off fabric according to the measurements or your template. But scissors can also work fine.
- Chalk/fabric marker: You’ll need to use chalk or a fabric marker to draw the fabric’s measurements and lines. Without these marks, it’s impossible to cut the cloth blindly.
- Straight pins: Use ballpoint pins to guide you when you start sewing. These pins slide through fabric smoothly and hold the pieces together easily when you’re working.
- Measuring tape/scale: taking measurements is an essential part of sewing clothes, be it yoga pants or anything else. So make sure you have tapes and scales ready.
Also, you might need some other tools and accessories. You can use templates, pattern weights, and embellishments, depending on how you want your yoga pants to look and how you want to work on making a pair from scratch based on your sewing expertise level.
4. Taking Measurements
Now it’s time to take the measurements. You can take somebody’s help to get this part done. Once you have taken the measures, mark the fabric accordingly. Maintain negative ease, i.e., the garment should be slightly smaller than your exact body measurements so that the pants fit you snugly.
5. Prepping the Fabric
Since fabric may shrink after washing, it’s best to mark measurements on it after washing it. Then, you can start cutting. Don’t throw away the scrap fabric after cutting it. Use the pieces to practice sewing with your machine so that you know how it looks. Once you are confident, you can stitch the main fabric.
Finally, with your pattern, fabric, and tools all ready, you can start sewing. You will enjoy the process, and even if the first pair of pants doesn’t turn out to be the way you imagine, you’ll get there soon. You can use the not-so-perfect yoga pants at home where no one will judge you!
Final Lines
Hemming yoga pants to get the length you desire is not difficult. You need the right tools and develop basic sewing skills, like making stretch stitches.
You can hem your yoga pants by hand, though using a sewing machine will make the process quicker. Eventually, you can even make your yoga pants.
More Posts for You:

